In addition to the growing number of frameworks available on Pupil Asset, users can also input their own statements and assess learners against these. Creating your own frameworks allows schools to personalise Pupil Asset around your approach towards assessment, using a structure and language that suits you.
To create your own framework navigate to Admin > School Options > Frameworks . As this function is based within the Pupil Asset Admin tab, you will need to be an Admin or Admin Plus user.
This page displays a list of frameworks which a school has turned on and which therefore display on the Multi Tick and DNA Tick pages. To create a new framework, click Create/clone framework at the top of this page.
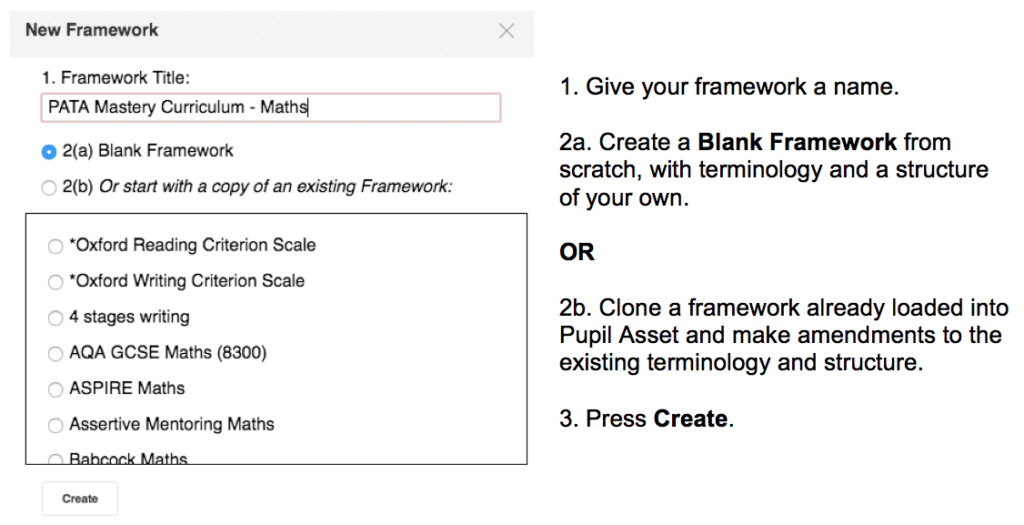
Setting the parameters of your framework
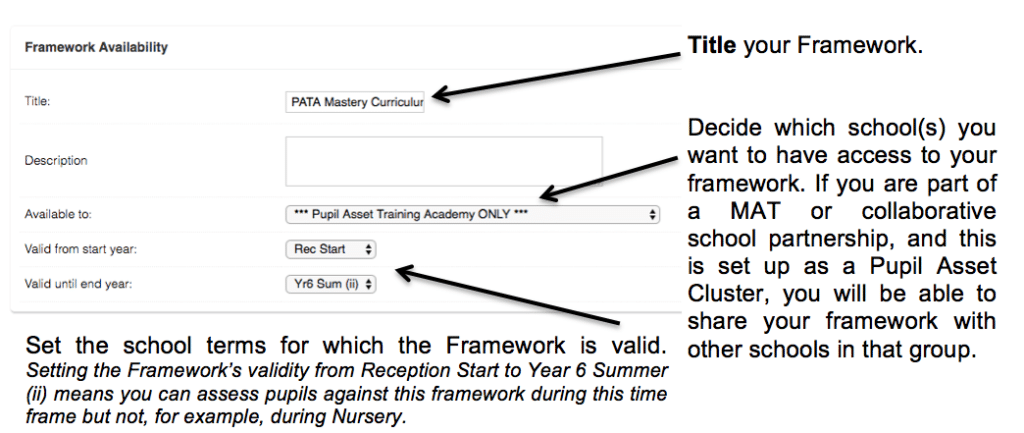
The remaining settings, ‘Commercial Frameworks’, ‘Framework Options’ and ‘Advanced’ do not need to be completed when creating frameworks for individual schools or school clusters.
Click Save at the bottom of this section.
Setting up Assessment Statuses
Assessment Statuses are the colours that are used to populate frameworks on the Multi Tick page. Statuses are used to indicate the level of understanding, mastery or depth that has been achieved.
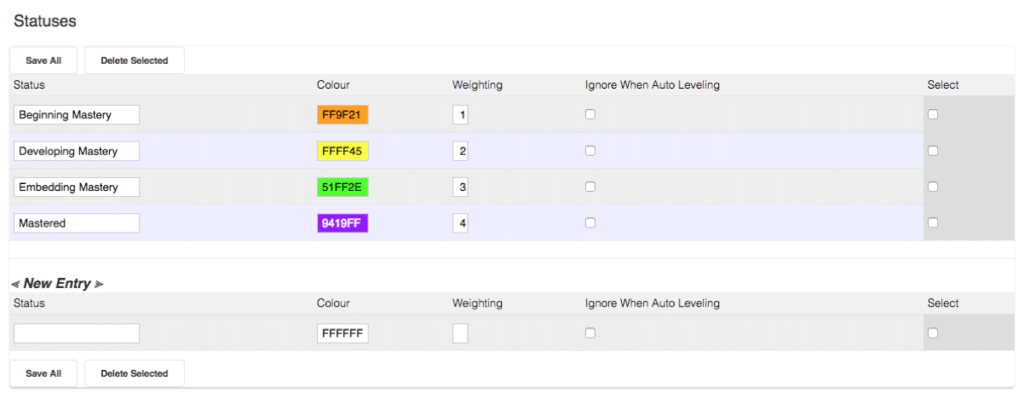
1. Under New Entry enter:
– the name of your Status;
– a colour for the Status. To do this, click on FFFFFF and choose the appropriate colour with your mouse;
– if desired, enter a Weighting value for a particular status (see below);
– leave the ‘Ignore When Auto Levelling box’ un-ticked.
2. Press Save All and the Status will appear in the ‘deck’ above.
3. Repeat this process until you have all the Statuses you need.
If you edit a Status within the ‘deck’, ensure you press Save All to ensure the change takes effect. Should you wish to delete a status, tick the relevant box in the Select column and press Delete Selected .
Weighted values
‘Weighting’ Assessment Statuses allows schools to express learner’s achievements across the framework as numerical values. As learners acquire more skills and deepen their level of understanding, the weighted value increases. This value can also be expressed as a percentage of the maximum weighted score possible. This Weighted Percentage allows schools and teachers to determine how far through a framework a learner has progressed and how deeply they have mastered the content taught.
Setting up ‘Age Levels’
Age Levels are the progressive stages of a framework. Despite their name, they do not need to be organised into age-related expectations. Age Levels can be used to represent any progressive stages where levels of difficulty, competency and understanding increase from one to the next.

1. Under New Entry enter:
– an Ordering – a number that determines the order that each Title will appear;
– a Title such as ‘Stage 2’, ‘Year 2’, ‘P Scale 2’, ‘Months 40-60’, ‘Foundation Tier’;
– set the Age Level to Active;
– the Associated Year Group is optional. In age-related frameworks such as the National Curriculum (2014), Age Levels are associated with particular year groups. If this is the case, linking an Age Level to a particular year group can make filtering easier within the Pupil Asset website.
– if you wish, you can determine a point after which an Age Level should no longer be seen. For example, you may wish to prevent Year 3 pupils being assessed against the Year 2 Age Level. To do this, the Year 2 Age Level would need to Hide after Year 2 Summer (ii). If you don’t want to hide an Age Level, select Always relevant;
2. Press Save All and the Age Level will appear in the ‘deck’ above.
3. Repeat this process until you have all the Age Levels you need.
If you edit an Age Level within the ‘deck’, ensure you press Save All to ensure the change takes effect. Should you wish to delete an Age Level, tick the relevant box in the Select column and press Delete Selected .
Structuring your framework
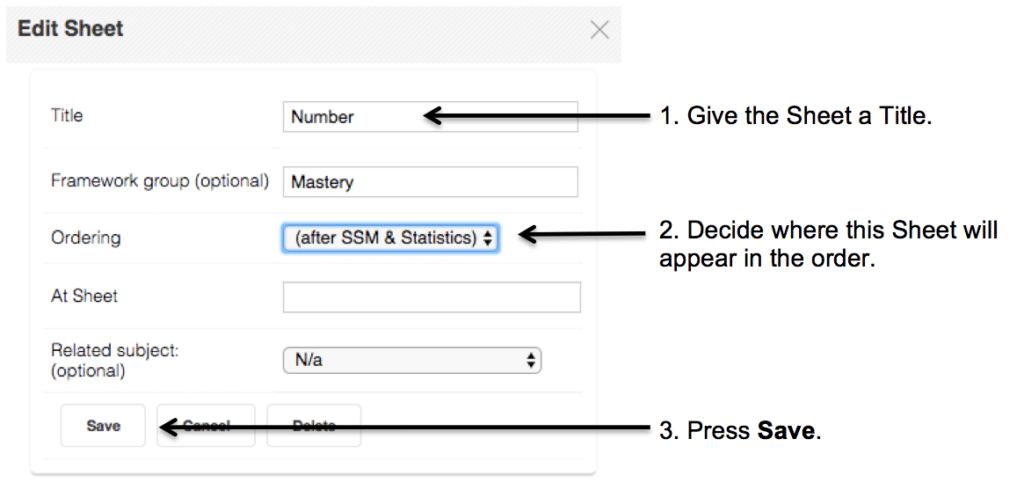
As well as structuring a framework into progressive Age Levels, you may also want to organise your assessment statements into different areas or categories. Sheets are broad aspects of a framework. They can be sub-categorised into more specific Areas . Assessment statements then sit within these specific Areas of the framework.
1. Click New Sheet .
2. Repeat this process for each Sheet needed.
3. Within your new Sheet, click New Area .
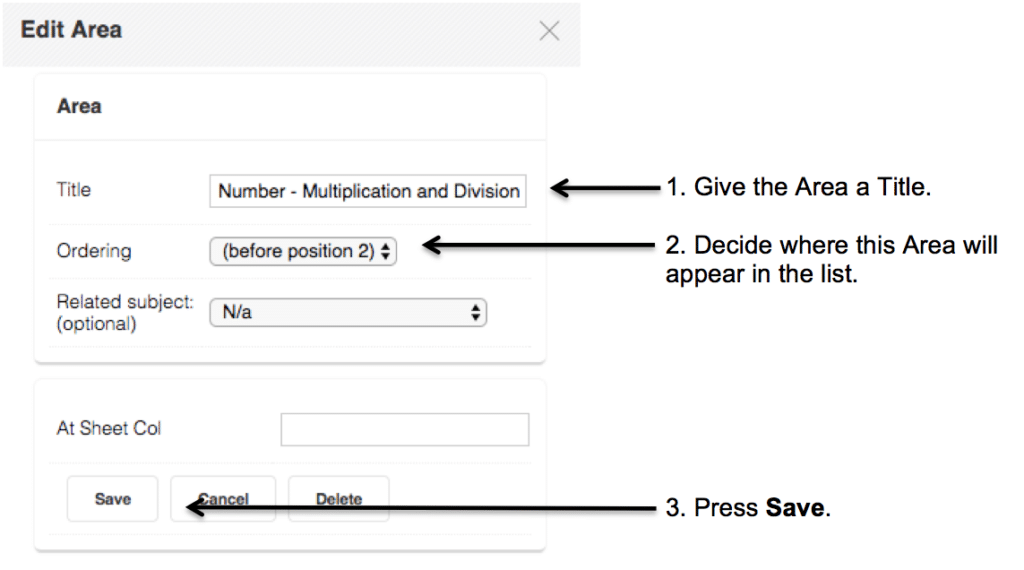
4. Repeat this process for each Area needed.
Each time an Area is created, you are taken to a page where assessment statements can be added. If you’d prefer to continue organising Sheets and Areas within your framework and to then upload statements, you can leave this page by clicking on the name of your framework ( underlined in purple) at the top of the page.
Adding assessment statements, child-friendly versions and exemplifications
Within the relevant Sheet click Edit Achievements . Areas appear along the top of the page and Age Levels down the left-hand side.
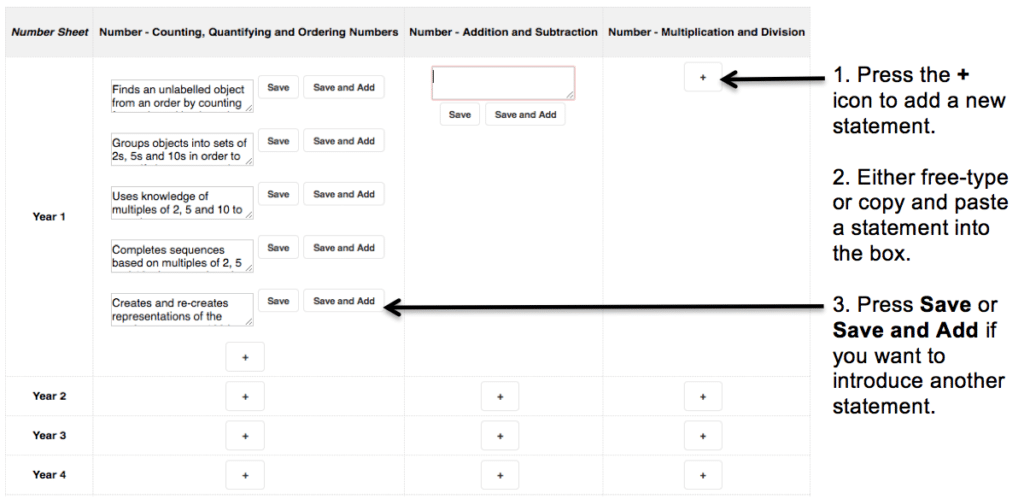
When completed, or if you want to save your changes and continue with your framework later, click one of the Save buttons.
To add child-friendly versions of assessment statements, click Edit Child Friendly Versions under Sheets .
To exemplify assessment statements, click Edit Exemplifications .
To complete the set up of your framework, click Save at the top of the Framework Settings page. From here you can navigate to a different area of Pupil Asset in the usual way.