To get the most out of Pupil Asset Tracker, it is important to keep your data up to date and in good order. Follow these steps to ensure a smooth start to the new academic year.
NB: These help notes are intended for schools using Pupil Asset Tracker. These schools will continue to use a separate Management Information System (MIS). If you are a PA MIS user, see ‘How to prepare for the academic year – MIS schools‘.
Do you have the overnight MIS Link?
This link transfers key data from your MIS to Pupil Asset Tracker each evening, ensuring pupil records are up-to-date.
Yes – If you have the Overnight MIS Link, most start-of-year routines are carried out automatically. Complete Steps 1 to 3 and then, ensuring that your MIS is fully up to date for the new academic year, jump to Step 7.
No – Follow all Steps (1-7).
Step 1: Check your staff
In order to comply with GDPR, it is important to review who has access to your MIS.
Has there been any staff leavers during the year?
Will there be any leaving at the end of term?
If yes, does their contract have an end date and have they been archived?
Archiving Staff
Navigate to Admin > Staff and click on the staff member to be archived.
Click on the Edit tab at the bottom the of the window and click Archive. This will bring up a prompt – click OK.
Add the staff leaving date in the End Date field and click Save.
Step 2: Update your calendar for the new year
Navigate to Admin > School Options > CalendarSetup and in the term dates for dropper, choose the appropriate academic year.
Ending a staff contract
Navigate to Admin > Staff and click on the staff member. Click on the Salary & Contracts tab on the left-hand side – this will show their active contracts. Click on the Edit tab of the contract. Next, open the Contract Details window, add the end of contract date into the End Date field and click Save.
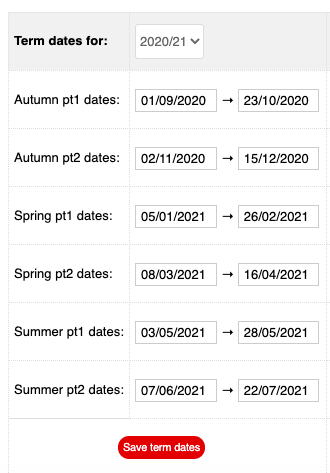
Check the term dates and amend in line with your upcoming school calendar, inclusive of any Inset days. For example, if your pupils start back on the 5th September, but the school is open for staff from the 3rd September, input the 3rd September 2019 as the start date.
Once you’re happy the dates are correct, click save term dates. This will then populate the calendar.
Finally, for any inset days, click on the appropriate date in the calendar and change the status from O:Open to T:Training.
Click Save.
Step 3: Set up a new timetable for the year (optional)
Click on New Timetable.
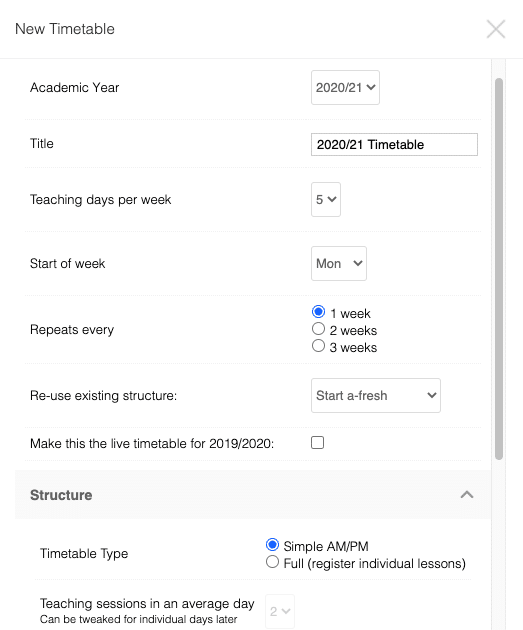
Select 2020/21 from the Academic Year dropper.
Amend theTitle to 2020/21 Timetable.
Then put a tick in the box: Make this the live timetable for 2020/2021.
If you’ve used a timetable structure differing from the default, choose 2019/20 Timetable. If not, leave as the default in the Re-use existing structure box.
Leave all other settings to the default and click on Setup.
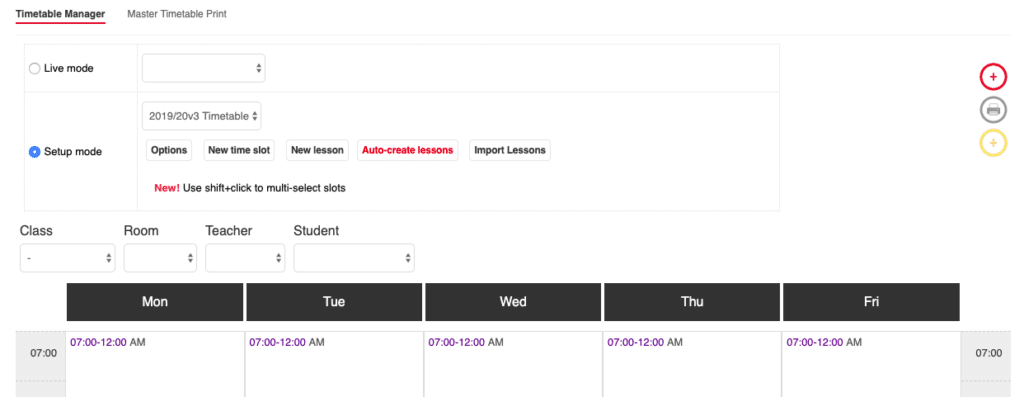
After saving the Timetable, the set up pane will be opened automatically.
Click the radio button on for Setupmode and select 2019/20 from the dropper.
Click on the the Auto-create lessons button.
This will then link your calendar/timetable to your classes and allow teachers to take the register.
Finally, go back to the Calendar Setup via Admin > School options > Calendar Set up and select 2020/21.
Check that under the Timetable, 2020/21 Timetable (the timetable previously added) is entered for each term.
If it says, No timetable set or a different timetable is set, select the appropriate timetable from the dropper and Save term dates.
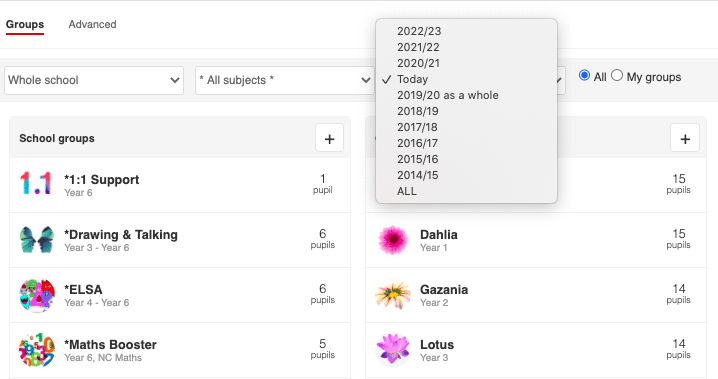
Step 4: Review groups/classes
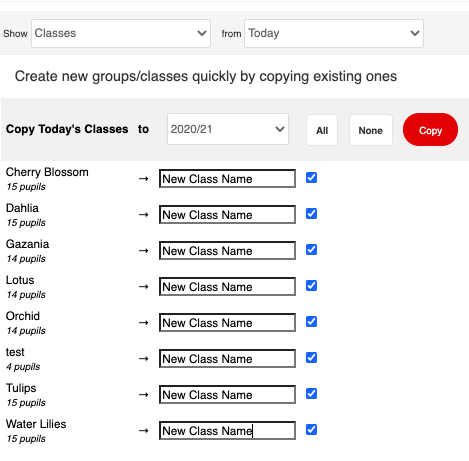
Navigate to Pupils > Groups and click Advanced.
Choose which groups/classes you would like to copy to the new academic year and rename as appropriate.
Setting up a new class structure
If you are changing your class structure, with pupils changing class (so you can’t just re-name the classes you have), you’ll need to set up the classes from scratch.
To do this, navigate to Pupils>Groups.
The dropper defaults to show classes and groups available today, change it to the academic year you want to create the new class in.
Click on “+” in the Classes pane to open the new class window.
Add the class name and then click Save.
This opens the Class Edit tab. You can add pupils by clicking “+”, select the required pupils from the picker and click the arrow to add them into the class.
To add teacher/s to the class, click on Users, select the required teachers/TA’s, and click the arrow to add them to the class.
You will need to repeat the process for all new classes.
Step 5: Export Leavers
First, use the Filter to select the relevant year group and then all the pupils who will be going to the same destination. To do this, click on the Pupil Picker (the number next to the word Filters), tick the required pupils and click Apply.
Alternatively, pupils can be selected via Pupils > Pupil List. Use the Filter to select the relevant year group, then tick the required pupils. Select Choose Pupils from the Pupil actions dropper.
Having selected the relevant pupils, navigate to Go to Admin > Export > Leavers Wizard.
Select the Destination LEA and Destination School from the droppers – this will auto populate the Destination Establishment Number and School Name.

Under Leaving Details, click on End of Year – this automatically populates the date with the end of the academic year e.g. 31/8/2020.
Select Why are they leaving? from the dropper and choose the correct reason.
By default, there will be a tick in the Generate a CTF for these leavers box. It is likely that you will do this via your MIS and so this can be un-ticked.
Step 6: Import a Whole School CTF for the academic year ahead
Once your MIS has been updated for the new academic year, including when all new pupils have been uploaded, you will need to upload this information into Pupil Asset Tracker. Create a Whole School CTF (Common Transfer File) using your MIS and import this into Pupil Asset via Admin > Imports. For more help creating and exporting a CTF, click here.
Step 7: Roll up
Once all of the other steps have been completed, navigate to Admin > School Options > End of Year. Click the Roll up button.
This will move all pupils up one academic year and archive the now historic Year 6 pupils who left in the Summer.