This how-to guide will help you to integrate with InVentry, a software that speeds up your school signing in system. To do this you will need AccessAdmin level access to Pupil Asset.
To learn more about sharing your data with third party software providers, read this how-to guide.
Before you start
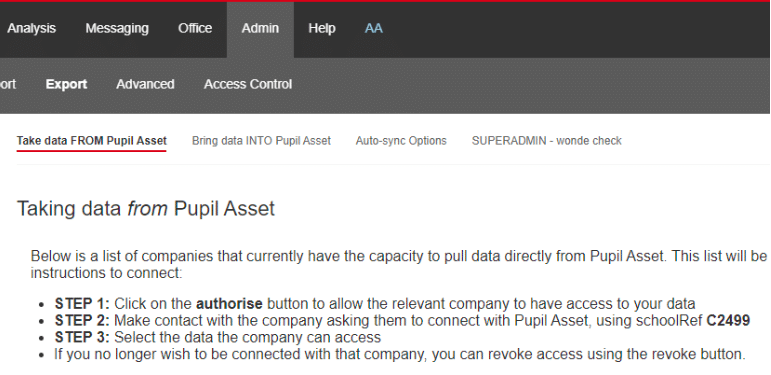
Navigate to Admin > Export > External API Integration and authorise InVentry so that they appear in the list of approved providers.
Setting up a user
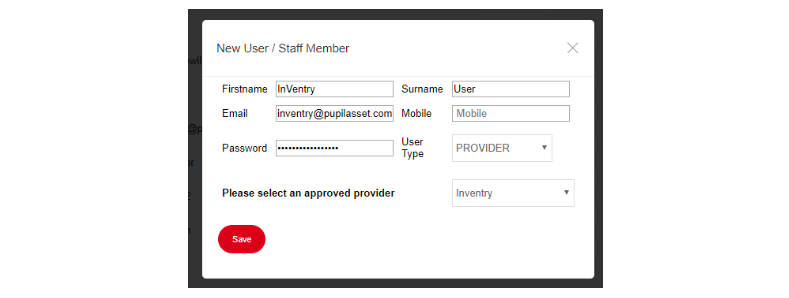
- Set up a user in Pupil Asset for InVentry.
It is recommended that you have a school email setup for InVentry to use. This could be an email address that already exists – but isn’t used by anyone in the school with access to Pupil Asset, or it could be one set up specifically for InVentry (for example, [email protected]).
- Navigate to Admin > Staff > Add new staff/user and fill in the email address set up for InVentry to use and a password.
- To enable access for InVentry the User Access Level should be set to Provider, selecting the provider as InVentry.
- Click save. You have now set up the provider user.
Handing over to InVentry
You need 3 pieces of information to pass on to your contact within InVentry – schoolID, username and the password you set for the provider user.
To find your schoolID
Navigate to Admin > Export > External API Integration.
You will find your schoolRef in step 2.
Your schoolID is the numbers from your schoolRef. For example, your schoolRef is C2499, this means your schoolID is 2499.
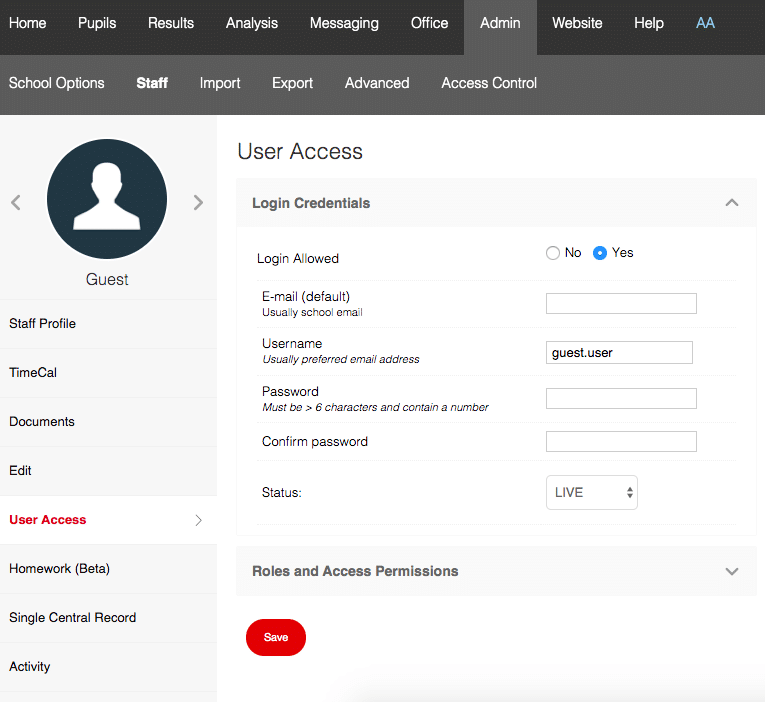
To find your Provider username
Navigate to Admin > Staff.
Click to open your provider user from the All staff/Users list.
Open the User Access tab to add, edit and save your provider username.
Once you have these details, and the password assigned to the user, InVentry can enter them into their User Interface and begin integrating with Pupil Asset.