Pupil Asset’s new Surveys functionality allows schools to create, edit and share surveys amongst staff, parents and even pupils via an online link that can be emailed or sent via SMS.
Creating a new survey
As an Admin user (or above), navigate to Admin > School Options > Surveys.
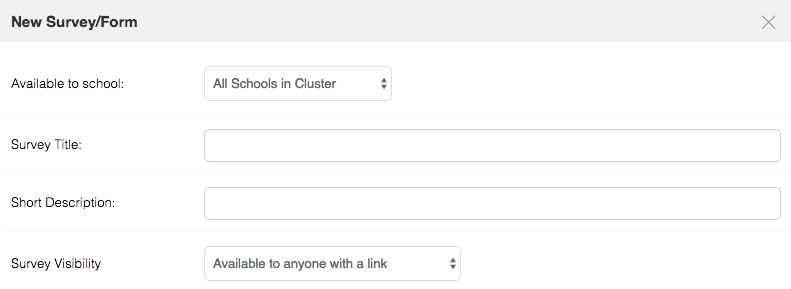
Click on Create new survey and complete the following sections:
NB: Teachers will only be able to participate in the survey if they are logged in to Pupil Asset (for verification purposes).
Parents will also need to be logged in via the Parent Portal to participate in a survey (an update to the APP will be coming soon, allowing parents to access surveys via the Parent APP).
After clicking Continue, the survey can be designed.
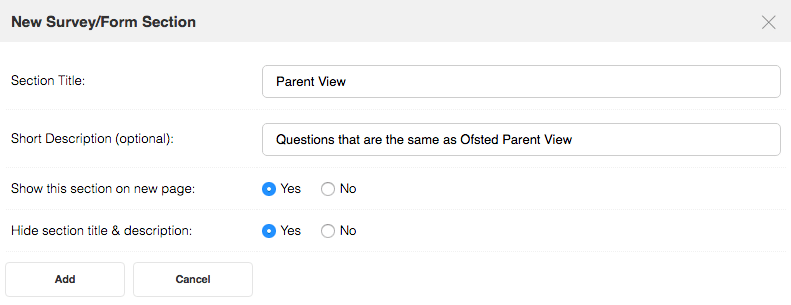
Click Add new section to create the first section of the survey.
Give the section a Title and Description (optional) and decide whether the section should be on a new page or not. Finally, decide whether the Section Title and Description should be visible to those taking the survey or for internal use only.
Click Add.
There are now several options to help you design the first section:

Click on the + to add some questions.
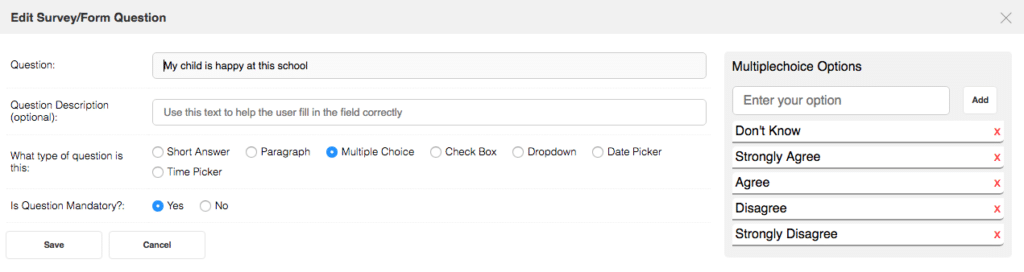
Choose what type of question you would like to add.
Short Answer will provide the participant with a text box in which to write their answer.
Paragraph will provide the participant with a larger box for longer responses.
Multiple Choice – see below.
Check Box – see below.
Dropdown allows the participant to choose from one of the provided dropdown options.
Datepicker will provide the participant with an interactive calendar from which they can choose a suitable date.
Timepicker will provide the participant with a choice of times where they can choose a suitable time.
Multiple Choice questions
For Multiple Choice questions, you will be asked to provide options. The participant will be able to choose one of the presented options.
The options will be presented in the order they are typed in and added.
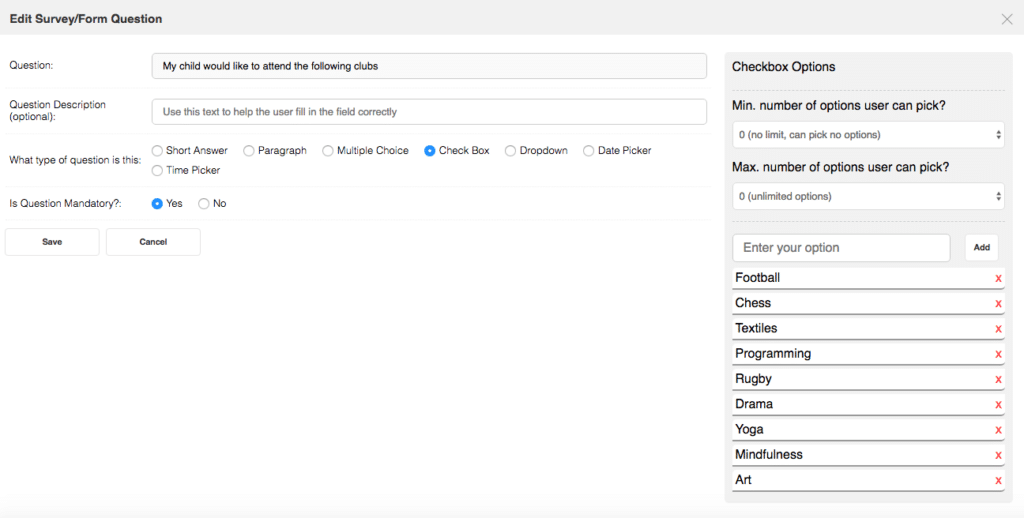
Check Box questions
Check Box questions allow the participant to choose from a range of options. Minimum and maximum number of responses can be stipulated. Options will be presented in the order they are typed and added.
Having added some questions, new sections can be added via the Add Section button. Sections can be reordered using the arrows if required.
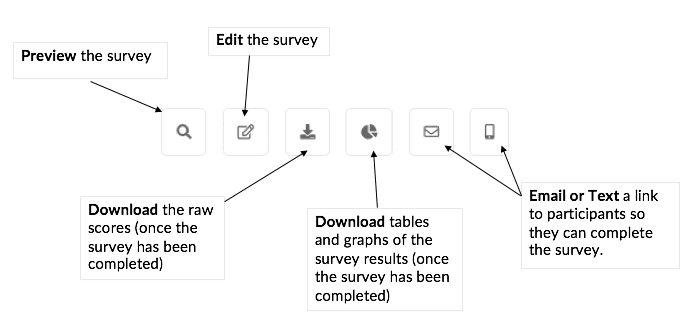
At any point, during creation of the survey, Preview Survey can be pressed to see what the survey will look like for the participant.
Once the survey has been designed, click the Surveys tab (on the left hand side) to return to the main Surveys page. The newly created survey will now be visible as a DRAFT. To make the survey LIVE, click on the EditSurveyicon and the EditInfo. Here, you will be able to change the Status of the survey to LIVE.
There are now several options for using the newly created survey: